


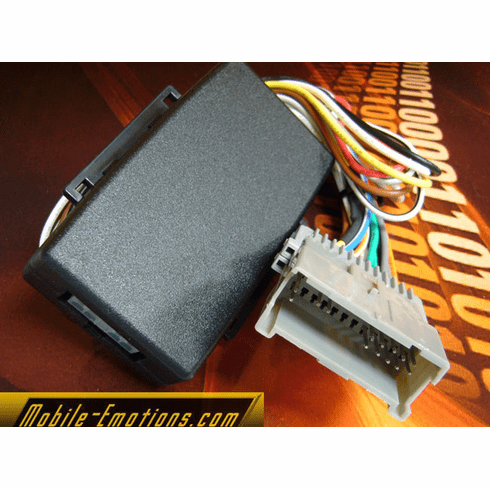

NC-GM39C��2000 - 08 GM Class II DataBus - Chime
2000-2008 GM w/Class II Data Bus system - Chime Control
NC-GM39C
THIS DOES NOT WORK WITH ONSTAR
This Part Is to Keep Chime in Your GM when Installing Aftermarket Stereo
� Uses factory speaker for chime
� Adjustable chime volume
� Generates a +12v switched output for aftermarket radios
� Automatic low voltage shutdown
� 3 switchable
Retained Accessory Power
RAP time modes (select vehicles)
Standard RAP
Extended RAP 20 minutes
Street RAP 60 minutes
� Illumination output wire
� Works on vehicles without OnStar, factory amplified, or BOSE systems
The most versatile and technologically advanced Chime & +12V accessory generator for your Class II GM vehicle that money can buy.
You now have the means to install an aftermarket stereo in your GM, Class II vehicle without losing the audible warning chimes; furthermore, this allows you to easily adjust the chime's audio level from soft to very loud as desired.
-
This accessory output works with GM's standard factory Retained Accessory Power (RAP) function and provides you with two additional RAP functions, Extended RAP and Street RAP.
-
For your installation convenience the GM CHIME also generates an illumination output.
-
This means no more unnecessary cutting and slicing of wires in the dash.
Your stereo's back lighting will turn on and off as the automaker intended.
(GM CHIME) EZ INSTALLATION FOR AFTERMARKET RADIOS
Wiring Diagram:
YELLOW (12V. Battery): This wire supplies a (+)12V. Constant power to the new stereo.
RED (12V. ACC ): This wire supplies a (+)12V accessory switched output for your new stereo, rated at 5 amps. For applications demanding more than 5 amps continuous* we recommend the use of a standard Bosch type SPDT or SPST relay available at your local auto parts supplier. *Such as high powered systems over 80 Watts RMS. (240 Max)
BLACK (Ground): This receives its ground input from the provided 24 pin male plug/harness when it is connected to the vehicle's female stereo harness. The BLACK wire is extended for the ground on the new stereo.
ORANGE (Illumination): The ORANGE wire is used when an illumination output wire is required for aftermarket equipment with back lighting. This wire becomes active and delivers a +12V output at 2 amps when the vehicle's lights are turned on. If this wire is not to be used, then it should be insulated to prevent a short circuit. To additionally use this wire for gauge lighting or under carriage lighting etc., a SPST relay is required. SEE Fig. 2
BLUE/WHITE (2) (Remote): Connect to the aftermarket stereo's AMP/REMOTE turn on wire. Note: If there are 2 Blue/White wires, twist together. Audio Interrupt Relays
WHITE: Left Front Speaker (+)
WHITE/BLACK: Left Front Speaker (-)
GRAY: Right Front Speaker (+)
GRAY/BLACK: Right Front Speaker (-)
GREEN: Left Rear Speaker (+)
GREEN/BLACK: Left Rear Speaker (-)
VIOLET: Right Rear Speaker (+)
VIOLET/BLACK: Right Rear Speaker (-)
When all the wire connections have been completed, and the 24 pin male plug/ harness has been inserted into the vehicle's female stereo harness, the green diagnostic LED will flash when the key is turned on.
IMPORTANT! extended rap, street rap and chime audio level adjustment
FEATURES CAN ONLY WORK ON COMPATIBLE SYSTEMS OTHER TYPE SYSTEMS WILL WORK AS NORMAL. TEST YOUR SYSTEM FOR DURING INSTALLATION FOR COMPATIBILITY.
TESTING THE INSTALLATION
You are now ready to test the installation.
1 .Turn the ignition key on. The RED accessory wire should deliver +12V which will activate the equipment receiving the power. A red LED that can be seen on the top of the GM CHIME will also glow.
2. Test the RAP function by turning the key to the off position with the doors closed. The accessory power will stay on. In most applications the RAP function will cancel and the accessory power will turn off when any one of the doors for a two door, or front doors in the instance of a four door, is opened. However, there are a few GM vehicles where only the driver's door is on the buss after the key is turned off. In these cases the driver's door will be your RAP function "Key" for all three RAP options.
EXTENDED RAP (Up to 20 minutes) * For GM Compatible Systems Only.
With ignition switch off, open the door. Turn ignition switch on and off three times. You can now leave the door open or closed and your radio will play up to 20 minutes. The Extended RAP function will cancel and turn off when:
a. Driver's door is opened and closed ONCE most vehicles, TWICE on some vehicles.
b. 20 minutes has elapsed.
c. The battery voltage falls to 11.5 volts. This feature insures that you will be able to start your car.
Suggested Use for Extended RAP Use the Extended RAP function for installed aftermarket gaming, video or other electronic equipment that you wish to stay on after you have exited the vehicle, remove the key and closed all of the doors.
Great for entertaining friends while you pump gas or quick stops without leaving your key in the ignition.
STREET RAP (Up to 60 minutes) * For GM Compatible Systems Only.
With ignition switch off open the door. Turn ignition switch on and off twice.
You can now leave the door open or you can close the door after 15 seconds and your radio will play for up to 60 minutes.
NOTE: Some vehicle do not require a 15 second delay. The Street RAP function will cancel and turn off when:
a. The drivers door is opened and closed TWICE.
b. 60 minutes has elapsed.
c. The battery voltage falls to 11.5 volts. This feature insures that you will be able to start your car.
Note: In some vehicles the passenger door is part of the RAP system and may affect the Street RAP and Extended RAP if open and closed.
Suggested Use for Street RAP Use the Street RAP function when you want the installed aftermarket electronic equipment to stay on when the doors are open and the key is out of the vehicle. A great way to entertain during beach or tailgate parties.
CHIME AUDIO LEVEL ADJUSTMENT * For GM Compatible Systems Only.
This gives you the ability to adjust the chime audio level from very soft to very loud in order to suit your personal needs. To adjust the chime loudness complete the following steps.
1. With the ignition key off and in the ignition, turn headlights on.
2. Open the driver's door. At this point you will hear an audible warning chime that incates the key is in the switch and the lights are on.
4. Rotate the dash illumination dimmer knob for the head light switch to make the chime audio adjustments. Turning the dimmer up will increase the volume and turning the dimmer knob down will decrease the volume. Once the desired chime volume level has been achieved, close the door and turn off the head light switch.
Your personal chime setting is now locked in. The dash lights can be re-set when head lights are on and door is closed.
* Please read the detailed pages on directions completely before attempting the installation of this device.
-
It may be necessary to remove the positive (+) battery cable as an installation precaution in some vehicles. However, cars that are equipped with navigational systems should not be disconnected from battery power. In these cases additional care should be exercised to prevent short circuits while connecting the power and ground wires to the harness.
-
Avoid installing this component where moving components operated from the dashboard can damage the product's wiring or enclosure.
-
Avoid installing where it directly receives air from the vehicle's heating system. This will prevent overheating and condensation buildup on critical components insuring flawless functionality for years to come.


